Walk through every room before each guest arrives and do a checklist each time as it will help you identify those little things that you would have otherwise overlooked, avoid negative reviews, and know that the property is safe for your guest.
An Airbnb property inspection checklist is a list that you go through room by room to ensure the home is clean, safe, and stocked to the guest’s arrival. This includes but is not limited to making sure the home is clean, appliances are working, smoke detectors are working, doors have locks, linens are present, and other items to avoid issues and keep your ratings and reviews high.
What Should You Inspect Before an Airbnb Guest Arrives?
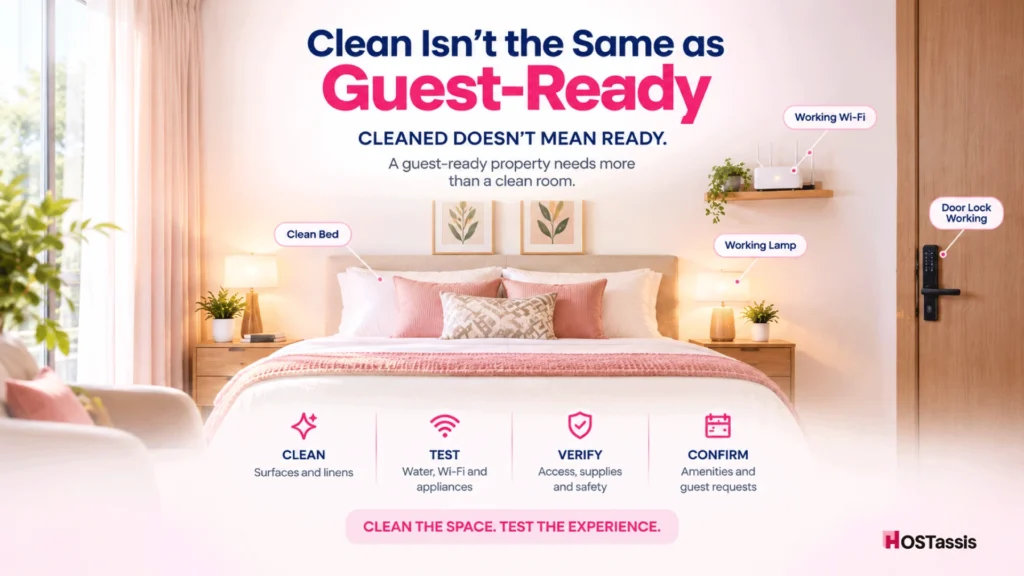
Before any guests’ arrival, a property must be inspected from the guest’s view to assure their access, comfort, cleanliness, functioning equipment, supplies, safety, and items are not damaged. It verifies that the turnover has done everything necessary to prepare the place, not to clean.
The clean is how to prep the property, but the inspection is to confirm that everything is up to the guest’s expectations. A cleaner might do everything needed on the list and still miss a dead router or a locked lock, but a second pair of eyes, looking from the same eyes as a guest would, can find those issues before arrival.
Start the Inspection Where the Guest Starts
A guest’s stay begins on the street, not at the front door. Walk the same route they will, from the curb to the lock, and fix anything that would make arrival confusing or awkward.
Check the Exterior Approach
Look at the following:
- Building number is easy to see
- Walkway is clear
- Exterior lights work
- Parking area is open
- Gates move and latch properly
- No rubbish or obvious maintenance problem
Check the Main Entrance
Test the real entry process, not just whether a lock exists. Use the smart-lock code, keypad, lockbox, key, building entrance or fob exactly as the guest will, from outside to inside.
Confirm Backup Access
If the main system fails, someone should be able to get the guest in quickly. Confirm there is:
- A spare key
- A second lockbox
- A local co-host or manager
- An emergency contact
Inspect the First Five Minutes of the Guest Experience
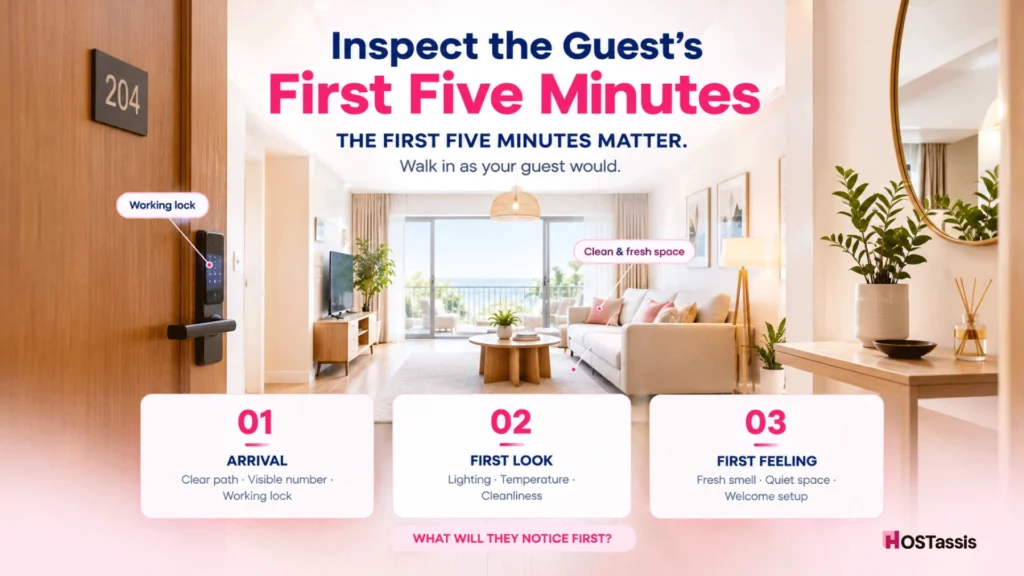
The first five minutes shape the whole review. Walk in as the guest would and note what you notice before opening a single cupboard. Small things like odor or heat often matter more than big ones.
Check these straight away:
- Smell
- Lighting
- Room temperature
- Visible dirt or clutter
- Damaged furniture
- Open windows
- Unexpected noise
- Welcome setup
Then ask one question: if the guest walked in right now, what would they notice first? Fix that item before anything else.
Current pre-arrival guidance increasingly recommends reviewing the property from this “first few minutes” angle instead of relying only on the cleaner’s checklist. A checklist shows what was done. This view shows what the guest will actually experience.
Living Room Inspection Checklist
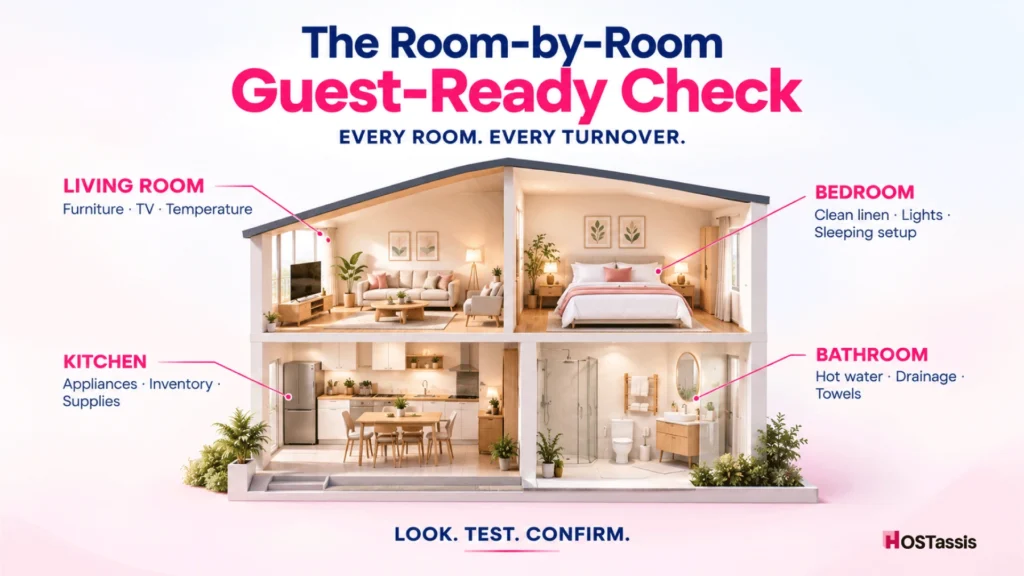
The living room is where most guests spend their waking hours indoors. Check that it looks tidy, that the electronics respond, and that the room holds a comfortable temperature without any guesswork.
Furniture and Presentation
- Sofa and chairs placed correctly
- No stains or damage
- Cushions arranged
- Tables clean
- Décor secure
- Curtains or blinds work
TV and Entertainment
Switch the TV on and test the remote and its batteries. If streaming is advertised, confirm it actually plays. Check that cables are connected.
Heating and Cooling
- AC or heating responds
- Thermostat set to a reasonable level
- Remotes present
- Fans work, if provided
Kitchen Inspection Checklist
Kitchen problems get noticed fast, usually at the worst moment. Test the main appliances, confirm the advertised items are there, and check that basic supplies are stocked for the first night.
Appliances
Switch on the fridge, freezer, hob, oven, microwave, kettle, coffee maker and dishwasher where provided. You do not need a full cycle every turnover. Just confirm each one works.
Kitchen Inventory
Count plates, glasses, mugs, cutlery, cookware and utensils against what the listing promises. Replace anything broken or missing.
Guest Supplies
- Dish soap and sponge
- Kitchen towels
- Bin bags
- Coffee or tea, if advertised
- Paper products
Bathroom Inspection Checklist
Bathrooms cause some of the most frustrating complaints, and many faults stay hidden until water runs. Run everything, check cleanliness, and confirm the basic supplies are in place before the guest arrives.
Water and Drainage
Run the hot and cold water, shower, taps and toilet flush. Watch how the sink and shower drain. A visual check misses cold showers and slow drains.
Bathroom Condition
- Toilet, shower and mirror clean
- No hair
- No visible mould
- No leaks
- No unusual smell
Bathroom Supplies: Confirm toilet paper, hand soap, towels, a bath mat and any toiletries the listing mentions.
Bedroom Inspection Checklist
Guests judge a listing by how well they sleep. Check the beds, the working parts of the room, and whether extra sleeping arrangements are actually set up, not just noted in the reservation.
Beds and Linen
- Bed made properly
- Correct bed configuration
- Clean linen with no stains
- Pillows available
- Blankets or duvets suit the season
Room Functionality
Test bedside lights, power outlets, curtains, AC or fan, storage, windows and doors.
Sleeping Capacity
If the booking needs a sofa bed, rollaway, crib or extra bedding, confirm it is ready where it should be. Do not rely on reservation notes alone.
Wi-Fi and Technology Check
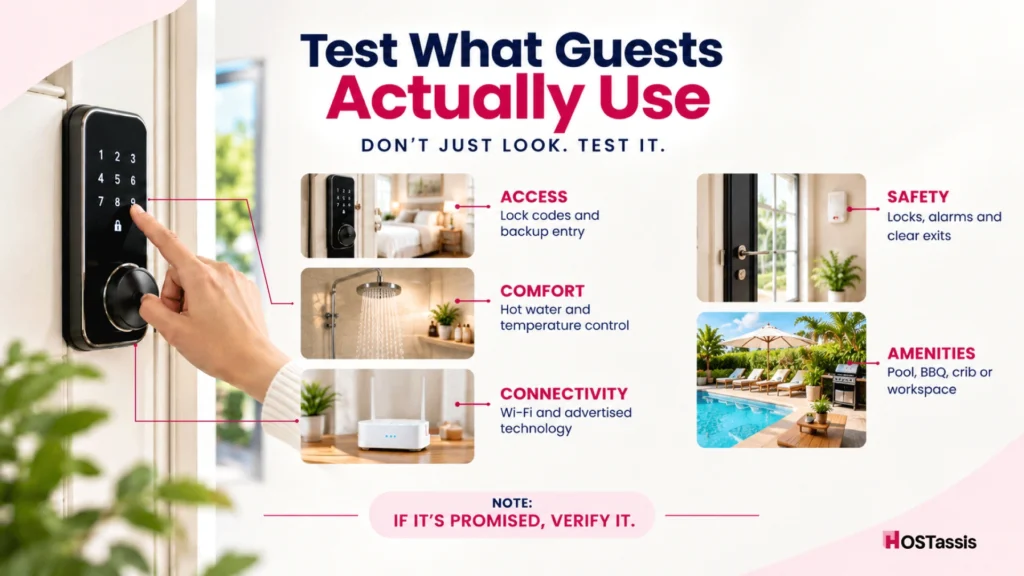
Do not just glance at the router. A router can look normal while the internet is down, so connect a device and confirm the network works before the guest arrives.
Verify the following:
- The network appears
- The password is correct
- The connection works
- The router has power
- Guest-facing smart devices are online
If they are advertised, also test the smart TV, streaming device, speaker and workspace equipment.
Should Airbnb hosts test Wi-Fi before every guest? Yes. A quick connection test prevents an immediate complaint.
Safety Check Before Guest Arrival
This is a quick visual and function check, not a compliance audit. Look for anything that could hurt a guest or leave the property insecure, and flag it straight away.
- Entry doors lock
- Windows close
- Handrails are secure
- Walkways are clear
- Smoke and CO alarms show no warning
- Fire extinguisher is present where provided
- Emergency exits are unobstructed
- No obvious electrical hazards
Detector testing, extinguisher servicing and code compliance belong in a separate scheduled maintenance process, not the turnover inspection.
Check Amenities Guests Specifically Booked For
Guests book for particular features, so a broken hot tub hurts more than a missing coat hanger. If an amenity appears prominently in the listing or influenced the booking, verify it before arrival.
Common examples include:
- Pool
- Hot tub
- BBQ
- Balcony
- Washing machine
- Dryer
- Parking
- Crib
- Workspace
- Fireplace
- Games or pool table
Do not inspect every amenity in equal detail. Prioritize the booking-critical ones first, and give the rest a quick look.
Check for Damage or Missing Items Before the Guest Arrives
Look for damage or gaps the cleaner may not have reported. Finding them before check-in gives you time to repair or replace things, and keeps the problem from landing on the guest.
- Broken furniture
- Cracked glass
- Damaged blinds
- Missing remote or keys
- Broken appliances
- Damaged walls
- Stained linen
- Missing inventory
Take Photos When Something Is Different
Photos help show what condition the property was in, whether an issue existed before check-in, and what the guest actually received. Turnover inspection systems commonly rely on final room photos for accountability and condition records.
Keep it simple. Document only what changed, and leave the claim process for a separate guide.
Verify Reservation-Specific Requests
A well-prepared standard property can still fail a guest who asked for something specific. Before you sign off, open the actual reservation and match it against what is physically in the home.
Check for:
- Crib
- Extra towels or bedding
- Sofa bed setup
- Accessibility request
- Parking arrangement
- Early check-in
- Pet setup
- Special occasion item
The 15-Minute Final Airbnb Arrival Inspection
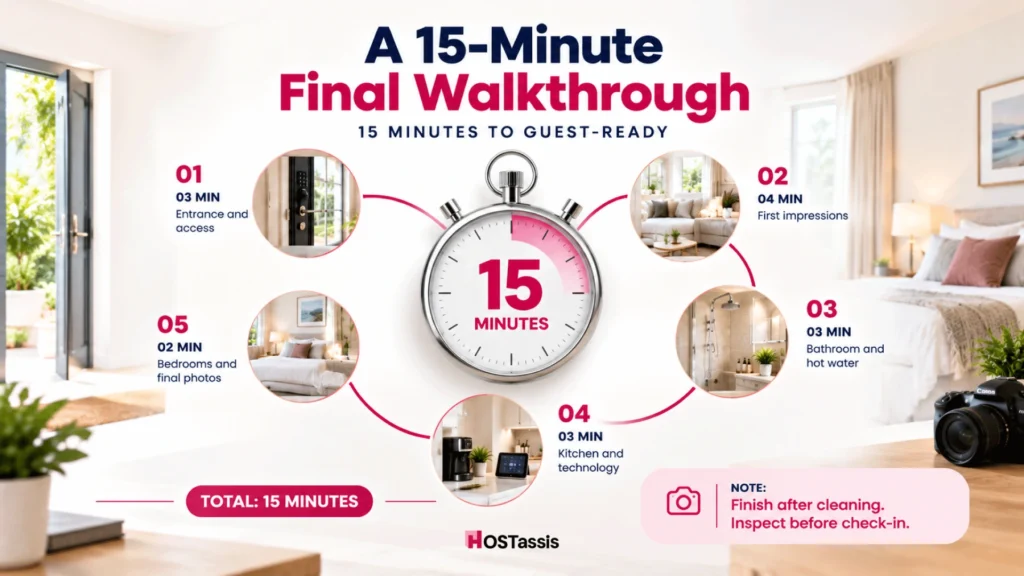
Follow this checklist after finishing cleaning but before the arrival of the guests. It will only take about fifteen minutes but would help spot any problems with the most used and noticeable objects in time.
- First three minutes, Entrance – make sure to check the outside of the accommodation, parking, doors, and keycard access
- Next 4×6 minutes, First Impressions – make sure to assess the scent, lighting, temperatures, and overall state of cleanliness and orderliness of the place
- The following 3×3 minutes, Bathroom and Hot Water – check how the toilets, sink, showers, and drains are functioning, along with towels’ placement
- Next 3×3 minutes, Kitchen and Technology – make sure that the fridge, kettle, and other devices are working, and check the Wi-Fi connection and TV;
- The last 3×3 minutes, Bedrooms and Final Walkthrough – examine the beds, sheets, AC or fans, special requests, doors, windows, and take photos of everything.
A walk-through procedure allows us to check the most common things in scope that the client may use during the accommodation. However, this process is not a replacement for cleaning or regular maintenance and cannot include all points of inspection for safety and other concerns.
Who Should Complete the Pre-Arrival Inspection?
The right person will depend on the scale of your operation and how much you want to separate out the quality control from the cleaning. There are four common options that are usually effective ways, but they vary in approach slightly:
Cleaner
A cleaner is already in the property, so it’s entirely reasonable for them to do a basic guest-ready visual check at the end of turnover. An appropriate solution for smaller operations, but be sure to remind the cleaner what aspects of the pre-check are concerned with water and electricity rather than overall neatness.
Inspector or Field Team
An inspector or field team member serves to separate quality checks from cleaning duties. It’s a good choice if you have several properties, because a person who hasn’t cleaned the home is more likely to spot a missing element or faulty goods.
Co-Host or Property Manager
A co-host or property manager is a good choice for high-value bookings, new or problematic properties because they will be able to assess the impact on the property, and approve or request any actions right then.
Remote Operations Team
A remote operations team is able to visually inspect photos and checklists, maintenance state, and review any reservation requests. Some companies that provide cleaning, maintenance, and check-in services for hosts, such as HOSTassis, offer this level of service as an option.
Should Cleaners Inspect Their Own Work?
Cleaners should do a final self-check, but larger operations benefit from independent quality verification, because cleaning and inspecting serve different goals and produce different blind spots in practice.
- The cleaner asks: did I complete the turnover?
- The inspector asks: is this property ready for the guest?
This distinction is central to current professional STR inspection guidance. A fresh pair of eyes catches what familiarity hides.
What Should Be Photographed Before Every Guest Arrival?
Take enough photos to prove condition and confirm quality, and no more. A short, consistent set is easier to review and far more likely to be taken every time.
- Living room wide shot
- Each bedroom
- Bathroom
- Kitchen
- Key amenities
- Entrance and access setup
- Any existing damage
Hundreds of photos is just admin. Aim for condition evidence and quality verification.
Common Pre-Arrival Inspection Mistakes
Most inspection failures come from habit, not carelessness. These mistakes repeat across properties, and each one is easy to fix once you spot it in your own routine.
- Assuming a clean property means everything works
- Checking visually without testing water, Wi-Fi or access
- Using one generic checklist for every property
- Forgetting reservation-specific requests
- Skipping final photos
- Finding a problem but not assigning anyone to fix it
- Inspecting too early, then letting vendors enter afterward
A problem only gets fixed when someone owns it, so assign it on the spot.
Airbnb Property Inspection FAQs
Should Airbnb be inspected before every guest?
Yes – a rapid guest-ready check between turnover and arrival can spot access, maintenance, inventory, cleanliness or amenity issues before the guest finds them, protecting your reviews and limiting last minute fixes.
Is an Airbnb inspection the same as cleaning?
No – while cleaning returns the property to a presentable order, an inspection ensures that the finished property is functional, properly presented, stocked and ready for the incoming party. Though the jobs overlap they answer different questions.
How long should a pre-arrival Airbnb inspection take?
It depends on size and complexity – while a small listing may only need a cursory final audit, a large home with pool, hot tub or other systems will need extra time to test thoroughly.
What is the most important thing to test before Airbnb check-in?
There’s no one vital component, but access, hot water, Wi-Fi, temperature control, bathrooms and sleeping arrangements cause the most immediate problems. Start there if you’re low on time.
Should hosts take photos before every Airbnb guest arrives?
For bigger operations, yes – consistent final photos provide a quality control and a reference for what the guest saw, with minimal extra work if the pre-arrival inspection remains lean.
When should the final Airbnb inspection happen?
As soon as possible after cleaning and any other work is completed, but before guest access commences. There is limited value in conducting an inspection prior if vendors or cleaners will be disturbing the property.
Can an Airbnb property inspection be done remotely?
Partially – a remote manager can verify photos, lists and devices, but leaks, smells, drainage problems and some maintenance issues require a local presence to assess.
Final Guest-Ready Sign-Off
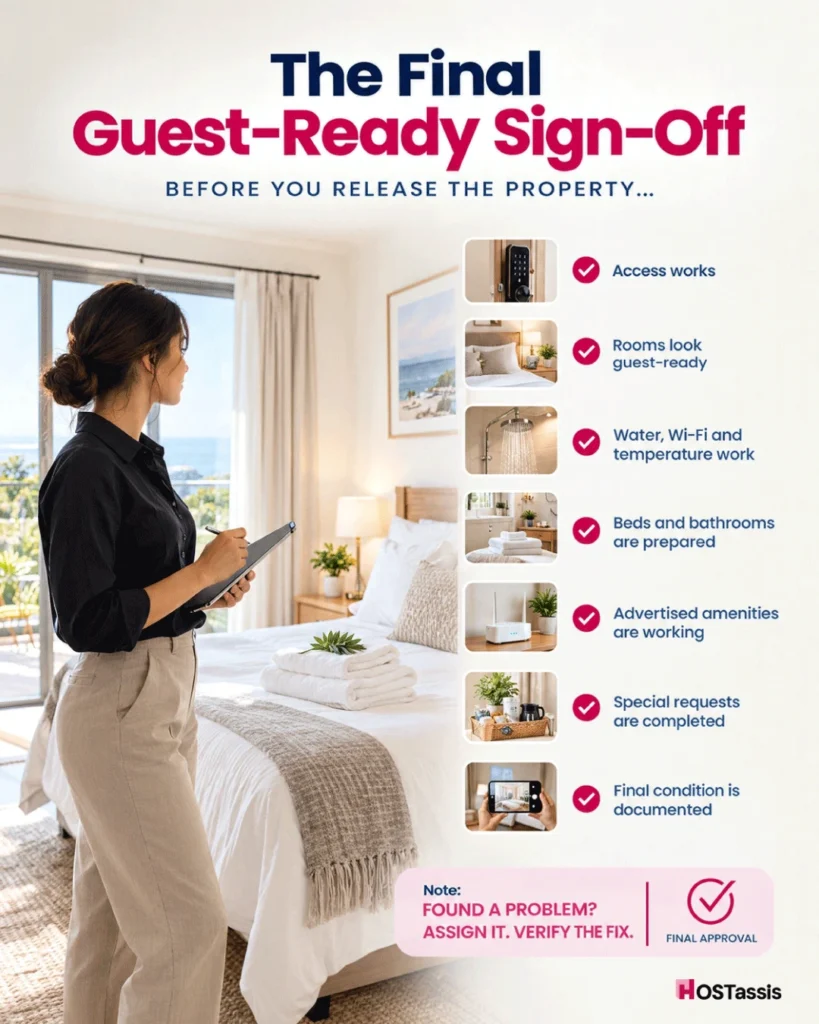
Before you release the property to the guest, run through one simple chain of checks. If every link holds, the guest walks into exactly what your listing promised them.
Access works → property looks ready → water, Wi-Fi and temperature work → beds and bathrooms are ready → advertised amenities work → guest requests are completed → final condition is documented